GARETH KIRKLAND PHOTOGRAPHY
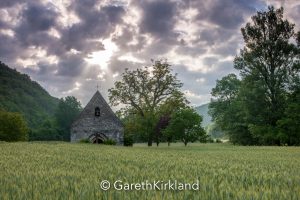
Well I have to admit that, with all good intentions, this spring and summer were not the most successful, photographically speaking. I went out pre dawn several times, but generally came back empty handed. As we know, in landscape photography, success or failure depends on the natural light that we are given, or not. There’s nothing that can be done when the skies are not forthcoming. The most beautiful composition in the world will be rendered flat and uninteresting. The worst weather condition for me however, is clear blue skies. Great for holidaying but not for taking pictures. Often this ‘great’ weather is accompanied by rising temperatures, which creates another problem, haze. Haze kills contrast and definition in the picture and you can end up with a muggy mess, rather than the sharp contrasty image you imagined. Later on in the day, this harsh light also creates problems. With no cloud cover, the contrast levels go through the roof, giving bright burnt out highlights and black featureless shadows.
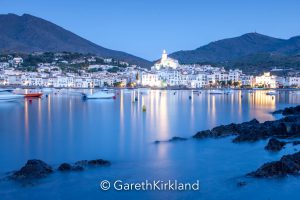
So, in the spirit of this, the first image shows a location, that in many ways is less promising than the following two, but is more successful due to the fantastic sky. The next two images, in contrast, are examples of failures. Probably not great for my Google rankings, but what the heck. In these two examples, I’m convinced the composition works, in fact I’m very exited about the locations, but due to the dead sky, for me they just fall flat. So these locations will join my long list of shots to get. It may be some time before I get back there, maybe years, but at some point I will.
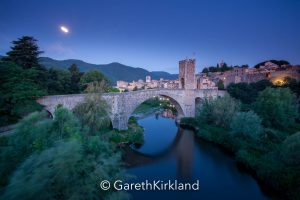
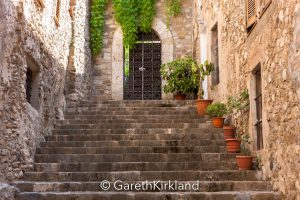
The last two shots show, that even in the glaring mid day sun, with cloudless skies, shots are possible. It’s all about finding locations, out of the glare of the sun, where dappled and reflected light, can be very pleasing.
>Photography Website
My Photography Website has now been updated and streamlined. All my latest images have been uploaded and there is now a full translation into French of every page. All my photo prices are now in Euros, which might make an appealing proposition to those who benefit from a weak Euro.
In addition to this I am offering a 10% discount to all my clients on my mailing list, and those following me on Facebook or Twitter. This special offer will run from now, until the end of the year. So if you’re thinking of Christmas presents, it might be a good time. Please email me before ordering to claim the discount. I have also added links to Facebook and Twitter, so please free to befriend or follow me on theses sites. I will regularly be posting, blogs, photography tips and special offers.
Photography Workshops in France
My Photography Workshop site, also now has a full French translation. I have also changed the prices into Euros, which again should make an attractive offer, especially with the British and the exchange rate. The main reasons for doing this were that I live in France and the fluctuations of the exchange rate don’t really affect me too much. But also when my workshops were in GBP, it was proving just too expensive for my French clients, over 700€ at one point. The first and last weekends of October are now full, whilst the second and third week have just two places remaining. So if you have been thinking of joining me on a workshop this year, don’t leave it too late.
Photographic Tip
Printing Photos
I know this might not directly affect all of you, as a minority of people print their own work, even professionals. But it’s been something I’ve been working on and thinking about, a lot lately After ten years of printing my own work, I’ve more than ever come to understand, that creating strong, truly representative prints, is not an easy process.
The fact is that many of us now see our images on the screen nowadays, computer, tablet or phone. The printing of images has largely died, only to be seen in the low res, pour quality prints in magazines. But the fact is, even the highest resolution screens will display only a fraction of the detail possible compared to a high resolution print. Editing a photograph for the screen is a relatively easy affair, normally a few minutes work. Editing for print however, is a totally different ball game. In fact, in order to create great prints, one must fully understand how different these two mediums are, and the effect they have on the image.
The first step is to have a good quality screen. It’s very difficult to accurately edit images for print, if your screen is not able to display the contrast and full gamut of colours available in the print. Also a large screen helps. I use a 27” Mac, which is not the absolute best screen quality available, but still very good, and when you take this into consideration, makes Macs actually good value for money.
The next step is make sure your screen is calibrated. You can do this yourself often with existing software within the computer, but I have generally found this a rather long winded route and not very accurate. The easiest way, is to buy calibration software that will read your screen and automatically adjust colours, contrast, black and white point etc.
The next step is to calibrate you printer. This involves uploading a colour chart, normally from your paper supplier, and print the image. You then send this image back to your supplier for evaluation. They will then send you, by email a paper profile which you will use to print your images. You have go through this process with each different paper type you use as the profile is specific to the paper type used, i.e. gloss, semi matt, canvas etc. You can of course just use the generic profiles that come with your printer, but a specific paper, printer profile will give you a much more accurate match between the print and your screen.
So after all this calibration, is it not just a question of pushing the print button and seeing the print exactly as you see it on the screen? Well yes, and no. I have a special lighting system to view my prints, giving a constant colour temperature of 550 degrees kelvin, i.e. replicating natural lighting conditions with no colour cast. Under these bright lights the prints look perfect, the colour match is amazing. The problem is that we very rarely see pictures under these ideal lighting conditions. Once you take that print to another room it will generally appear to dark, not to mention colours actually shifting, depending on the differing lighting conditions you are viewing the photo under.
This comes to the nub of the problem of viewing a photo in print compared to the screen. A computer screen is back lit and creates its own luminance, where as the photo relies solely on the ambient light falling upon it. The print will invariably appear too dark compared to the screen. So for the print, generally you need to increase the exposure by 20% to 30%. When you do this however the photo will loose contrast and look a bit washed out. Therefore you also need to increase contrast. That’s why programmes like Lightroom come with a brightness and contrast slider that can be applied to the image in the print module. The problem with this is that each image will react differently and some will need more lightening and contrast than others. So these sliders may be useful if you are doing a quick print run of non critical images, but generally they are something I don’t use and prefer to create a copy of each image, which I will then edit specifically for print. It’s a long winded way, but if you are very caring about the finished print, it’s the only route. This process will invariably involve making several test prints, until I’m absolutely happy with the finished print. In a sense you start from scratch with an image for print, but with experience however, you learn how certain images are likely to react in the printing process, which can make it quicker.
I am told that Ansel Adams spent up to a month editing a single image for print, a bit over the top you may think, but when you consider, a print of his will sell for many thousands of dollars, perhaps not.